Posts

Showing posts from April, 2014

Creating the Draft: Works-Like and Looks-Like Model
Image
For our in-class exhibition, we have to present a prototype -- a model that looks and works like the final vision. Kat and I stayed late into the early morning, fine-tuning this piece with our recently ordered supplies. Kat and I broke down our interactive exhibit into a Work-Like Model , Looks-Like Model , and Learn-Like Model (storyboard). Now, we must combine all the bits and pieces to create our first draft of a fully working, aesthetically pleasing interactive display. Below is a spreadsheet of all the materials we purchased for the first rendition. Items such as wire, hair dryer, paper, etc. are readily available and require no cost. The budget is around $100, which is pretty tight for a large, electrically and mechanically robust project like ours. So, I think we did quite well in finding deals for the items we need in such a short turnaround (less than 24 hours). On Monday, I began working at 1:30 pm and didn't leave the lab until 4am. By then, I had only finished 3/4
Creating the Learn-Like Model

A "learn-like" model refers to how we want the experience of users to develop, as they interact with the Energy Bike exhibit, e.g. what we hope they learn, how we hope they learn it, etc. Kat, the "animator" of this duo, became really excited about designing a storyboard for the learn-like model and drew sketches of the user's activity and theoretical thoughts, accompanied by explanatory text. Tell us what you think.

Creating the Looks-Like Model

Image
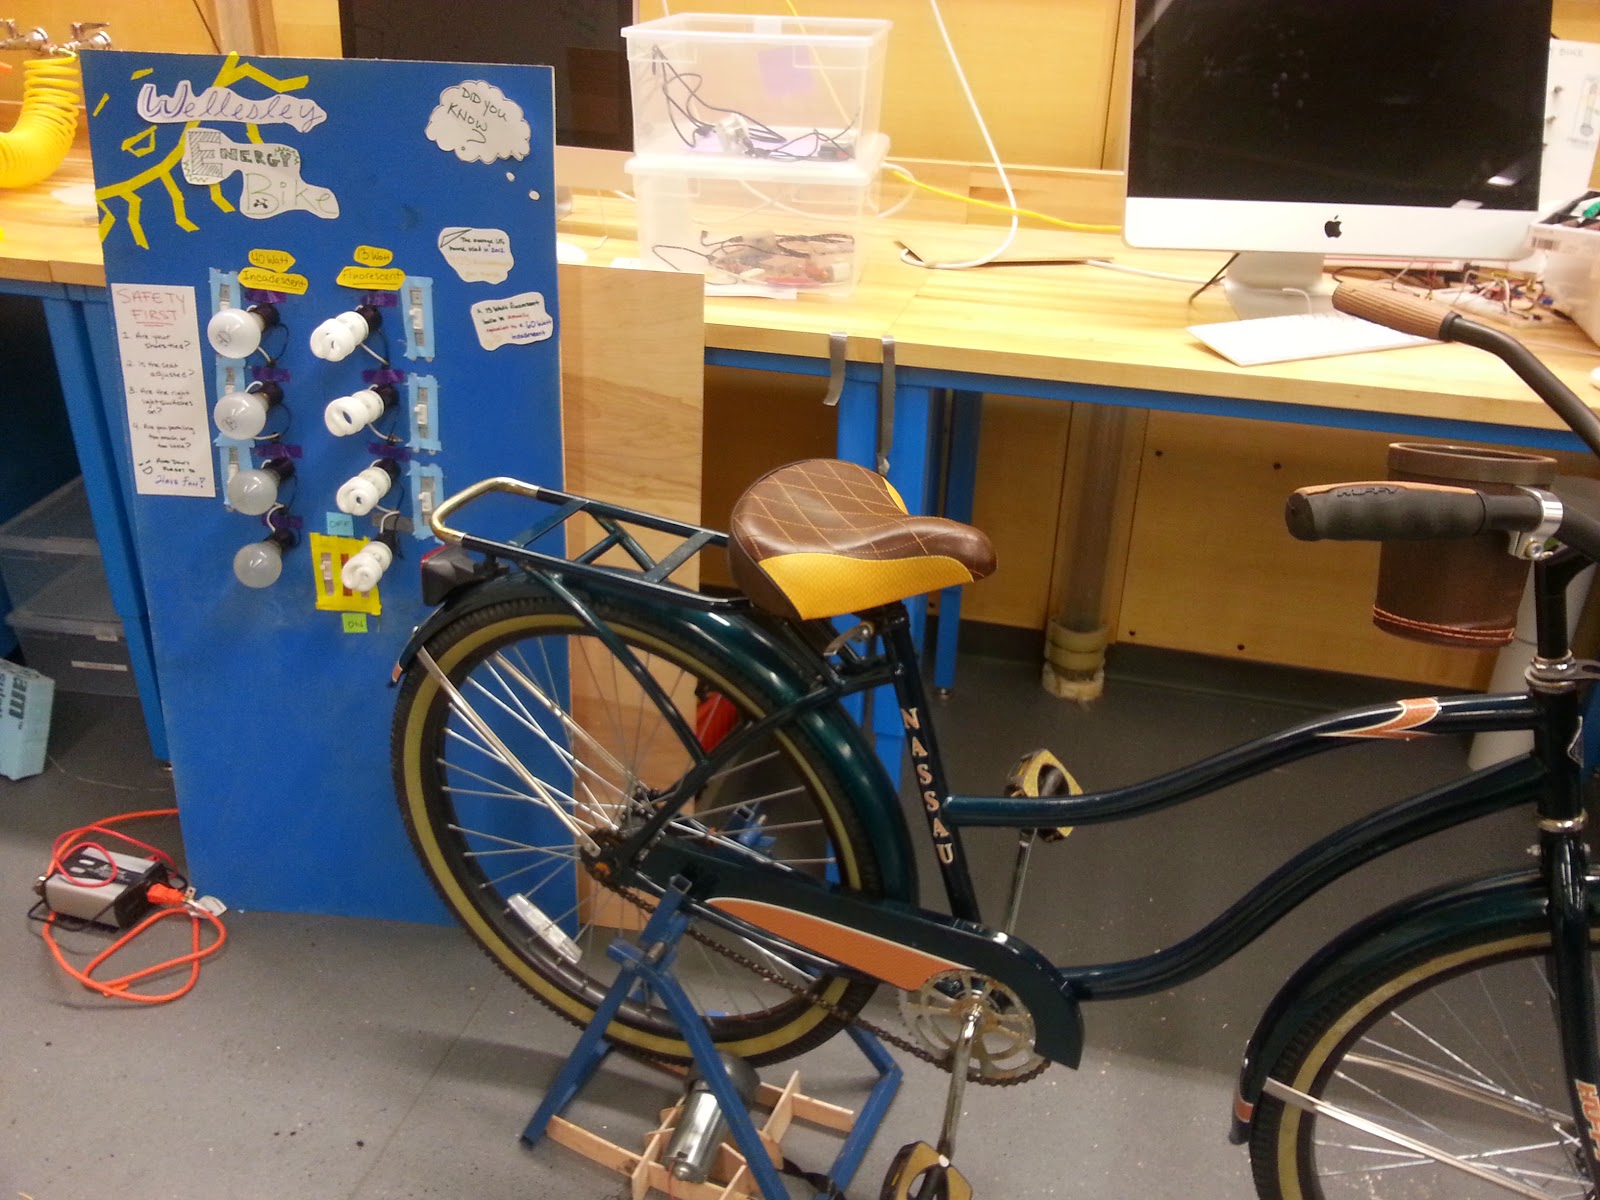
Last class, Kat and I built a model of our "vision" for the end goal, particularly regarding the "Look." We want the display to be fun, inviting, aesthetically pleasing and, of course, easy to understand. To go about creating such a model, we broke down the display into parts: we knew we would need a bike with the back wheel mounted up off the floor; a generator attached to the spinning wheel; and also an inverter between the generator and the board to keep the current in check for safety reasons. We started by cutting all of the electronic pieces out of foam and then used glue, paint, markers, etc. to construct and decorate them, close to their realistic counterparts. Fortunately, the Engineering Lab had a bike and a bike mount that we can use (though we found this long after Kat put all her energy into creating a lovely makeshift mount herself...). Kat's Makeshift Bike Mount Originally, we had planned on connecting the bike to the generator using a

Creating the Works-Like Model

Image
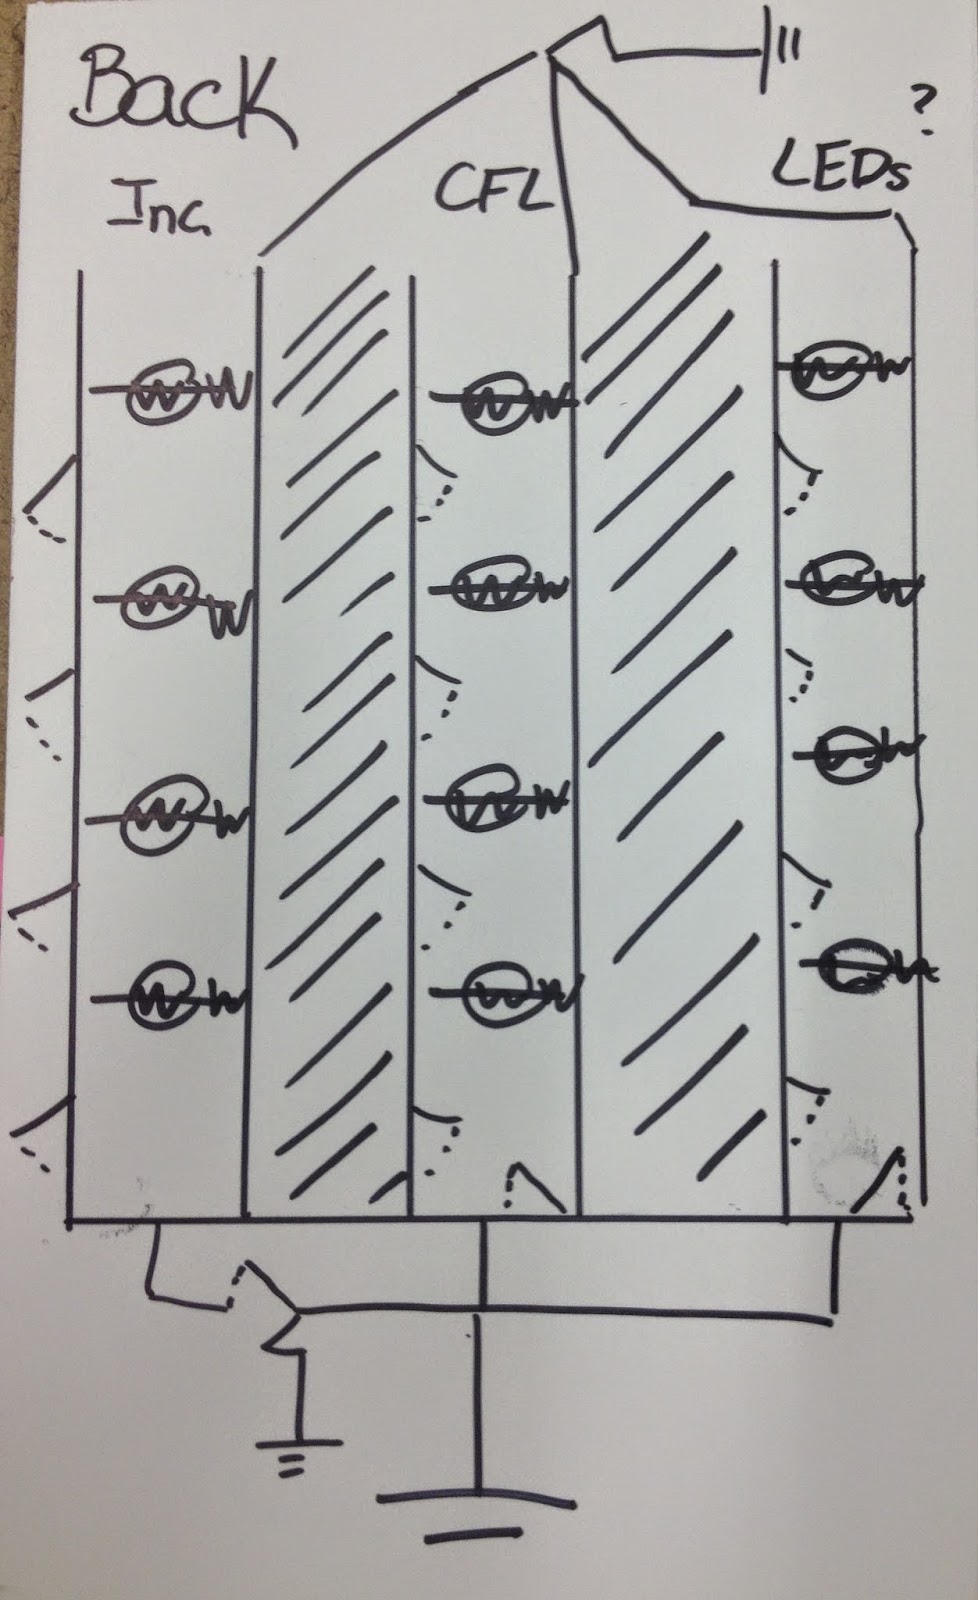
 Last class we worked on forming a "works-like" model of the energy bike, which focused majorly on the circuit board design. After trying out the diagrams we created in the class before then, we found out a parallel circuit caused too much power to be dissipated across the resistor (aka Too Hot! ) and presented a safety concern. Though most electricians utilize parallel electrical circuits when building a home (to eliminate the possibility of one burnt-out light to dismantle all electricity), we decided to place the bulbs in series and it worked perfectly. The bulbs decreased in brightness as each switch for an additional bulb was turned on -- and vice versa. The next thing we have to do is create a "Looks-Like" model and order the supplies for our final prototype.

Testing of Critical Elements

Image
Kat and I worked on developing our pedal powered light board last class and tested/experimented the circuit that could potentially power it. The project will require mostly custom-made parts but the circuit board will be the most challenging. We experimented with two options: the first includes user-activated switches to allow more bulbs to light up and the second uses Arduino to measure when the first set of bulbs are fully lit and when to switch to the second/third set. The second option allows the user to focus on pedaling and not stopping to manually change the circuit. For testing, we utilized a circuit board for Option 1, using a 9 volt battery, 5 270 ohm resistors and 5 LEDs. The circuit worked just as planned and the LEDs could be lit up simply by flipping the needed switches. This indicates that if we cannot fit in the Arduino, the switch design will work just as well.

Final Project: Energy Bike

Image
Kat and I received our final project "team" for my original idea of the Energy Bike (inspired by the Ohio Energy Project ) , where a bike pedaler can feel the relative amounts of mechanical energy it takes to power some every-day appliances. working towards her idea of creating a bicycle into an energy source. Goal:  Teach users about energy, energy consumption and the importance of conserving energy. By physically experiencing how difficult it is to generate energy into a usable form, the users will gain a new appreciation for it and the importance of being "energy efficient." We also found several videos of other energy bikes: https://www.youtube.com/watch?v=_3p5bWNHNxA http://youtu.be/IPXBgZ1gAPs?t=20s http://youtu.be/sy_3GVxiOlg?t=20s Mechanisms:   Bike Gears A standard gear setting so that the only change in resistance comes from the change in energy requirements from the appliance it is powering.  Pico-cricket or Arduino  Sensing/Feedbac

Thermal Systems II

Image
Michelle and I expanded Thermal Systems I to a thermistor system, which measures the heat dissipated across a resistor through altering the output system. Deliverable 1: Heating Curve Our first experiment was to determine the physical constants (Rth and C) from our simulated heating experiment in order to conduct our experimental run. Using  Rth = (T-Tair)/p and a maximum power of 6.5 V, we found the thermal resistance to be 2.05: (313.25 - 300)/6.5 = 2.05 T/W. Also, C = P/(dT/dt) =  6.5/ [(3.5-312.3)/(100)) = 21.6 W/(T/s) Deliverable 2: Simulation Differences (Rth*C) = the time constant, or time in which it would take our system to reach 63.2% of its 'plateau' value:  (2.05)*(13) =  26.65. Our own graph was approximately less than 2/3 of the way to that point, so we were on the right track. Deliverable 3: Bang Bang Controller The simulation cleanly levels off and maintains a constant temperature, whereas the experimental situation has a much rougher incline, wh

Time for a Coffee Break...

Time for a Coffee Break! Here's a fun, short post to lighten the mood: A wonderful friend of mine sent me a comedic video of what engineers feel like at meetings. As far-fetched as this skit is, I think it is pretty "spot on." But, what do I know? I just started the path of being The Expert. Oh, what we must go through to do our job... 

Thermal Systems I

Image
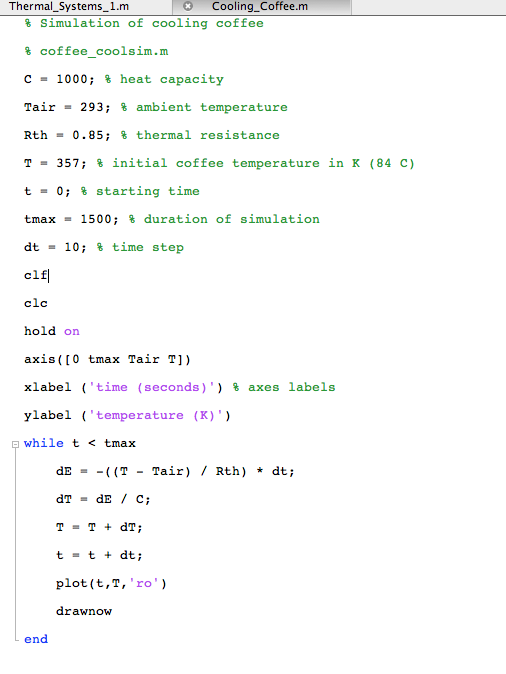
Question 1: What happens if we increase C and Rth? Change C from 1000 to 2000 Eunice and I predicted that if the heat capacity (the 'C' parameter) is increased, the cooling rate of the coffee -- or rate at which heat leaves -- decreases. We also predicted an increased thermal resistance (the 'Rth' parameter) would cause the same result -- a lower cooling rate and a longer time period for which the coffee stays warm. We implemented these changes separately and saw that our predictions were correct. Question 2: Calculate P to heat the coffee up to 84 deg. Celsius? Change Rth from .85 to 2 When it reaches its target temperature at 357 K, it hits equilibrium and there should be no change in temperature (dT = 0) at t = 2000 seconds. Restructuring the equation, we find P = (T-T_air)/Rth = 75.29 Working Backwards:  Find C and Rth Given T_final = 357, T_air = 293. We calculated this by using two scenarios: 1) Where the temperature reaches equilibrium at 8