Posts

Showing posts with the label Brainstorming

Truss Design 02

Image
The second part of the final project for EK301 (Mechanics) consists of a preliminary design -- or, rather, several preliminary designs and one identified draft. Having the data from the straw lab test and the resultant code to determine the approximate load that a straw can hold based on its length, it took quite a bit of creativity to find the perfect combination of straws. However, to simplify this process, the class was instructed to use a MATLAB code that would take a design and then indicate which member of the truss would fail first. It is important to note that all designs were given the same parameters: Figure: One of two designs selected The truss must be a single, planar, simple truss.  Members must be joined concurrently at joints using the provided pins and double pinned to the guest plates.  Gusset plates may be any geometry but must have an area of less than 16 sq. cm. All joint-to-joint distances must be at least 10 cm and no longer than 16 cm. The ...

Brainstorming Workshop @ UniCV

Image
This Friday, I took a step to introduce the WeLab teaching style by forming a brainstorming workshop between the UniCV engineering professors and students - and it was a  HIT!  A few days before we prepped by going over the brainstorming activity (below) Professor Banzaert did in my first class with here: what materials do we need, how will we use the most of an hour, what should the environment/vibe feel like, etc. I even got Paulo to agree to help breakdown the formal professor-student division that Cape Verde (and most schools everywhere) cling too. The day of, I was expecting each professor to bring maybe 1 or 2 students but there were  so  many people (20-30 people). After doing a brief presentation on Wellesley (same ECAA presentation) and the brainstorming rules (below), we had to break down into smaller and smaller groups for the activities. Even better, everyone who came was engaged and even wanted to stay longer to fuel more ideas and connections as ...

Project Scouting: Hydroponics 02

Image
Wednesday, we returned to the Hydroponics Center for a second visit. The director Joao quickly whipped up a meeting with a few staff members so we could sit down and talk more about Wellesley and the potential for collaboration. In addition to him, we spoke with one of the engineers there, a social scientist and an intern to ask them about their work and their ideas for the future. It started off a little slow since I think people were shy but then picked up pace as Mackenzie and I started seeding ideas and others built off of them. It's one thing to talk about thoughts at a table but it's another thing to actually see them. Together, we gathered a list of potential topics to explore there and then they led us outside to show us the topics they talked about: Investigation of renewable, sustainable energy sources (Solar and/or Wind).  They have several large machines necessary in seed sorting/planting, soil mixing, irrigation regulation, and daily office functions ...

Project Scouting: Hydroponics Center

Image
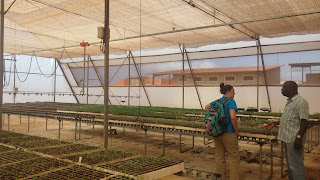
I am really glad I followed my hunch on the hydroponics project. That is an  amazing  facility and one of the most advanced I've seen here. I don't have much experience with hydroponics but from what I've seen, it works really well: the lettuce, tomato, and cucumber plants were absolutely huge! (Thursday, we met with the director Joao Monteiro.) He told us that, with hydroponics setups, you get bigger and more produce: they use a substrate and coconut fibers (to help stabilize the plant) in a pod as the plant grows up a rope. The facility also uses both drip irrigation and mechanical spray system that they sell to farmers. However, all of the water is pumped through an elaborate, advanced valve systems (through which they can regulate fertilizer too): It was a gift from their partner in Spain. They are able to plant so many many seeds so quickly because they also have an advanced seed-sorting and soil-mixing machine from Italy. Both systems have no siblings in Cape Ve...

Engineering at UniCV

Image
On Friday, Paulo set up a meeting with the engineering faculty at Uni-CV main campus, so that we could also make progress on the second goal -- laying the groundwork for joint projects for WeLab courses. Mackenzie and I had already headed into Praia for a meeting with the former "Ministry of Rural Development" (now Ministry of Agriculture and Environment) and ElectraSul - the water and electricity plant as well as desalinization plant. Unfortunately, there was some miscommunication for both meetings; on the bright side, we met with a statistician at the ministry and had more free time since we couldn't go to ElectraSul. Because we had some extra time to stroll around Praia, Mackenzie called a contact at the US embassy who she met on the plane ride over and we all decided to have lunch together. Lo and behold, we just so happened to go to the US ambassador's favorite lunch spot, and he sat with us over a meal. I am really glad all things happened like they did: I c...

"Draw Before You Think"

Image
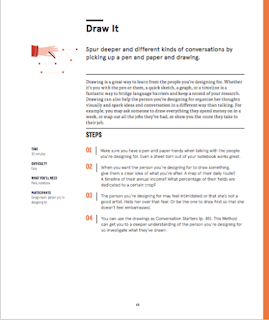
"Draw It" activity from IDEO's  Field Guide Another topic that has also preoccupied my thoughts is the act of observation. What is the least intrusive way I can observe and connect with the people of Cape Verde? How can I minimize the dynamic and disruption that Western/American tourists usually bring? Mayrah Udvardi, who I met during my first year and her last year at Wellesley, developed a wonderful presentation about this topic and presented it at a MaddyTalks - a reunion at the Albright Institute. (Watch below.) I remember when she told me that she had won a Watson Fellowship and was planning on not taking any electronics, drawing the whole experience as she travelled for a year. I was just as much impressed and excited for her as I was worried, considering STEM and architecture fields require a lot of documentation that is usually electronic. Now, after practicing it and hearing this same notion from design professors, I can absolutely say that  drawing ...

Service-Learning 101

Image
(Heads up, this is a long post.) Prof. Banzaert recommended three books to me as an introduction to service-learning basics and humanitarian engineering methods: Paul Polak -  Out of Poverty IDEO -  Field Guide to Human-Centered Engineering Kevin M. Passino -  Humanitarian Engineering along with a final project report on Santiago Islands. All of these readings were much better than I expected and offer great advice if interested in doing development work (as an engineer). Out of Poverty Polack describes twelve steps he used "to arrive at solutions to extreme poverty." I am not entirely convinced with his argument that poverty can be "solved" -- but he makes great points at how to go about finding a solution for human-users.  Go to where the action is Talk to the people who have the problem and listen to what they say Learn everything you can about the problem's specific context Think big and act big Think like a child See and do the obv...

Robot Art

Image
About a week or so ago, Professor Amy Banzaert - director of the  Wellesley Engineering Laboratory  - sent out an invite to enter an international competition and several students (we) answered the call. We're building a robot to make art! The  2016 1st Annual International RobotArt Competition  aims to foster innovation in artificial intelligence, processing and robotics. Considering that Wellesley is  not  an engineering school (and doesn't have an engineering department), we definitely have our work cut out for us and must be resourceful in our project. We had our first meeting on the Sunday before March and covered quite a bit for an intro into the area: What is robotics?  Have robots been built for painting, decorating, etc? What are our backgrounds?  How can we divide the project into parts? What to do for next time? With all of those questions in mind, we are absolutely seeking to grab more teammates and seek out help in ar...

Phase 2: Strategy Setting

Image
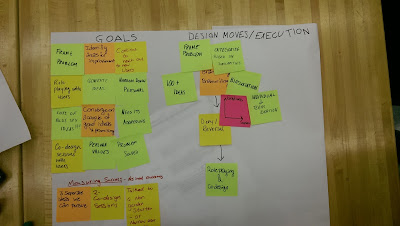
Setting a plan of attack for Phase 2 was relatively simple: the team created a table of co-design methods that would be effective for each people portrait/interviewee (aliases), ranging from role-play to story-telling to talking tours. The team also formed a process map along with a chart for goals, execution and measurements of success.

Personas: Understanding the User

Image
As students begin diving into Phase 1, the UOCD studios become increasingly colorful with the post-it note displays and mapping systems each team hangs around its space. PLANTS! -- after several sessions with persons identified as community gardeners -- began to squeeze all of the notes, reflections and insights we grabbed from each user. The team discussed their thoughts/findings (such as the difference between community  farms  and  gardens)  and set off to create  people portraits  -- a splatter of post-its with notes, insight statements, pictures, etc that we gained for each individual person. Upon creating the portraits, we also had to develop aliases for each to hold their identity confidential. (You may see one or two aliases in this blog when describing separate persons.) These people portraits were then used to create a framework called  personas  -- fictionalized users that hold (or base their traits off of) characteristics from s...

User Visits: Immersion

Image
Part of the EXPLORE phase is engaging the user and one can do so by through meeting directly -- which is exactly what we did. We split the group between two user visits, asked questions, took pictures and made our individual notes (to reflect together later). The entire purpose of meeting with our interviewee was to build this connection with the user, evoking stories and emotions while also shedding light on their reasonings behind actions (which they may have never questioned until this moment). However, our UOCD professors also told us to think outside the traditional interview phase. Immersion Methods It is important to grab the most amount of personality data from any user visit: we want to not only understand  what  they do -- but  how  and  why  they do it. How does their environment influence their decisions day-to-day? Is there other ways of going about the same task? Such questions go deeper into the  person  wh...

PHYS250H: Power Supply Project I

Image
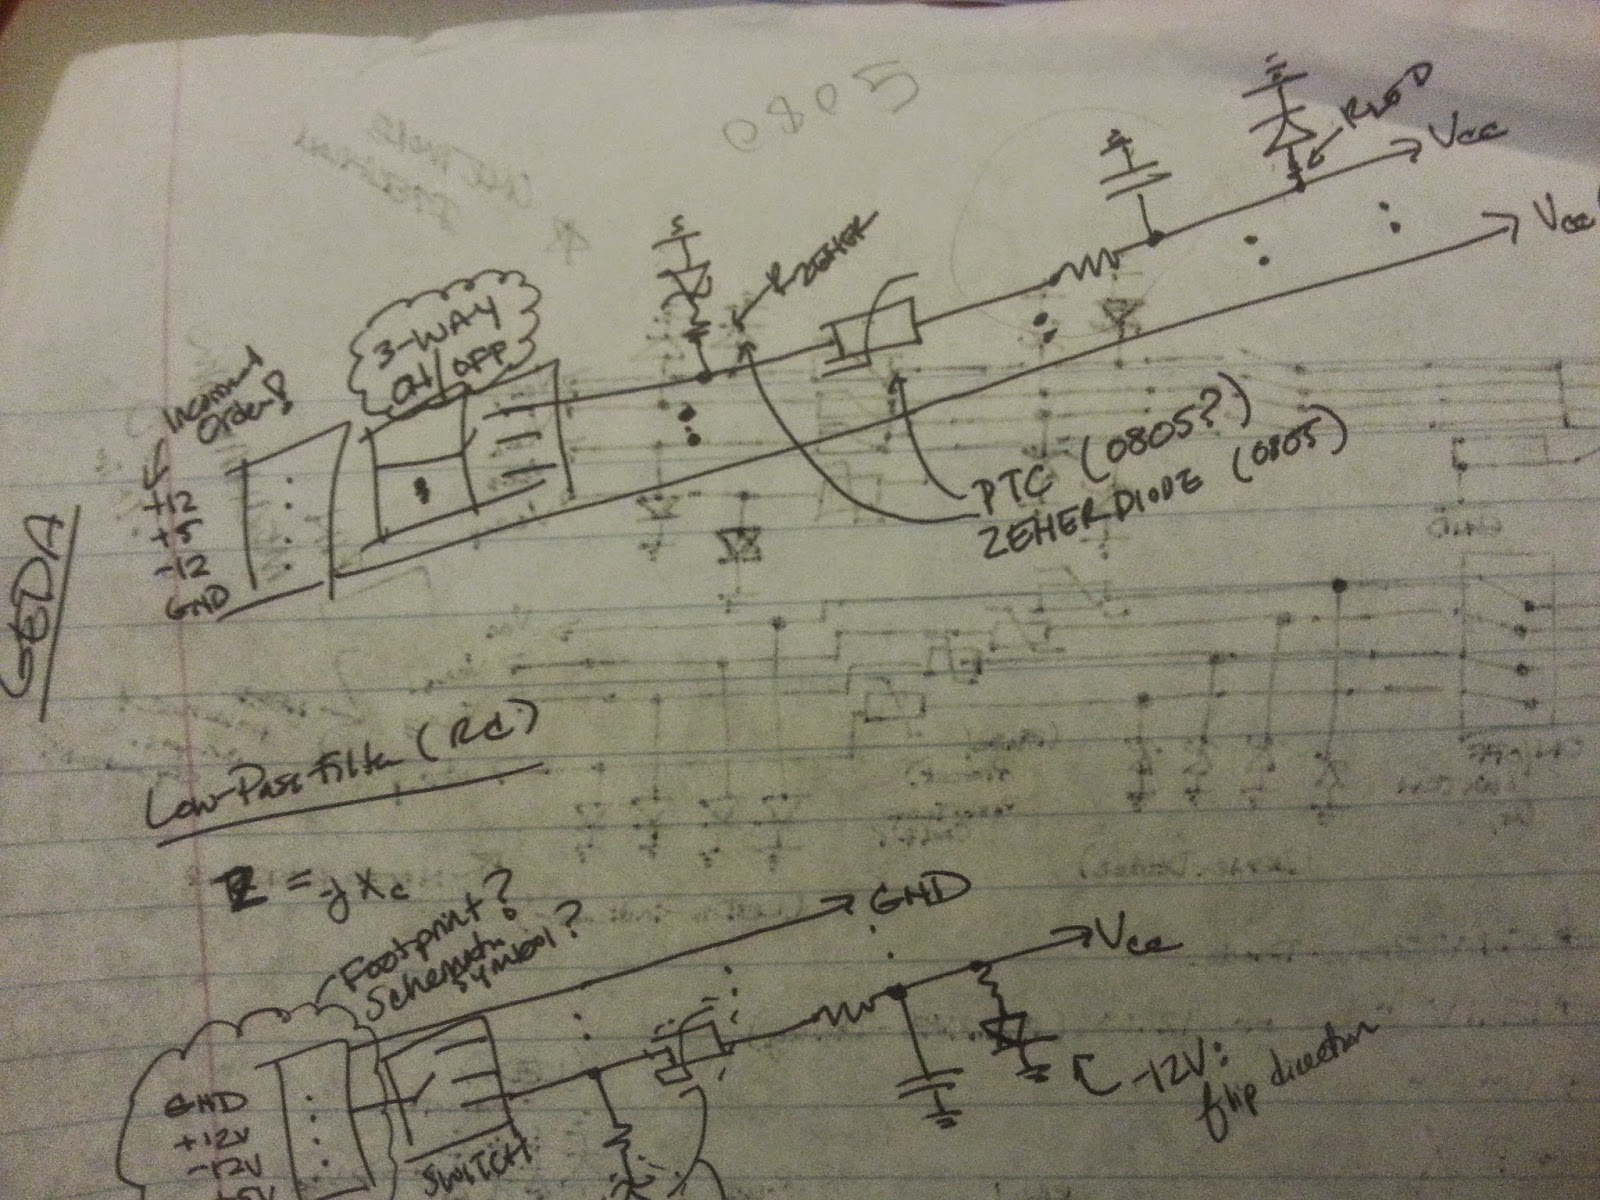
For Fall 2014, I decided to continue my work under Professor James Battat with the dark matter detector and he suggested doing so under PHYS250H -- an independent study in the Physics Department -- in order to receive credit for it. However, the project portion of the course veered from work with the PCB I created earlier and towards design of a PCB power supply for his Spring class PHYS310 "Experimental Physics." The power supply was needed for an Electronics student lab,  where a five-pin DIN draws in four voltage levels of +12V, -12V, +5V and GND for a solderless breadboard. The PCB I designed would use this connector to draw in the four voltage levels, filter for overcurrent and allow direct input into the rails of a solderless breadboard. At the beginning of the process, Battat and I create a concept diagram demonstrating the overall flow of the power supply and, from it, a rough circuit diagram was generated. Over time, the schematic changed with additional and...

CAKEBOT: Demo Day

Image
Demo Day was a huge success!  The night before, Griffin and I were able to see the final product and discuss what to work on/test for a brief moment, and I was able to get there before the scheduled presentation to clean up a previous team's remnants and prep our own product. Griffin and I were able to test a spiral design on a few sheets of paper on top of our dummy cake -- and it looked beautiful as onlookers watched and Griffin videotaped a portion. Unfortunately, we were unable to setup the limit switches properly as I would have liked to do so. Though, the positioning system of our polar-coordinate-based rotating platform worked so well that it did not matter as much as I was worried it would. Cassie and Emily then walked in with our final, pre-frosted chocolate cake for the demonstration. While they went on to watch others demonstration, I decided to create and edit a short promo/trailer video of our Cakebot to add into the presentation that would happen in 15 minutes. ...

CAKEBOT: Team Meeting I

Image
At our team meeting on Sunday after the first spring review, the crew decided to become familiar with the field at hand. We baked and decorated a 9-inch cake for observation. Baking the cake did take a portion of time and for the majority of that time, the team discussed ways in which we could extrude frosting. Emily and Cassie had taken a field trip to a Baking Store and found a Wilton Decorator Pro, which consisted of a plunging mechanism to extrude frosting from the attached storage container. Additionally, the tool allowed for interchangeable tips to create circles, stars, and waves. We took such a luxury into account for our design too. We reversed-engineered the Decorator Pro to understand how we could ensure that the frosting was forced out at a constant pressure. The Mechanics sub-team (Cassie and Emily) discussed how to remove the springs in order to directly integrate the equipment into the CAKEBOT, attaching the plunging arm to a motor for vertical movement. By then, the...

CAKEBOT: Sprint Review I

Image
At the end of every two weeks, there is a "sprint review" where professors circulate between groups to hear about and give feedback on the progress of each team project. The CAKEBOT team met for a long session the night before to finalize the physical, first iteration of the CakeBot design. We also sketched out the integration of the components for future sprints  to demonstrate that we at least thought about the mechanical, electronic and software pieces. The actual prototype itself focused on the cake rotating platform -- which we knew we would absolutely need for decorations on the side/walls of a cake -- and initial ideas on the icing dispensing system for the face. For the rotating platform, I used a cut-out circle of 9-inch diameter (for standard cake size) and we connected it to a servo motor. I then programmed the Arduino to "sweep" the servo to and fro; the motor itself was pushed into a hole cut out in the foam base. The foam base most likely will be a w...

Catch-up and the CAKEBOT: Final PoE Project

Image
Hello again!  It has been a while since my last descriptive post about my engineering journey though a lot has happened over the past few weeks, from PoE to We-Lab to W.E.S. to research talks. I almost have no time to blog -- almost no time ... So, to get back on track with my documenting the experience, I am submitting a series of posts about all the new developments. Olin's Principles of Engineering (PoE) PoE has kept me extremely busy as the labs have become more and more challenging, moving from simple LED lights to a 3D scanner to Proportional-Integral-Derivative (PID) motor control. PoE is meant to give students a balanced background in both electronics, mechanics and programming -- in preparation for the final project. For the final project, students were allowed to form their own teams and project ideas, which created a frenzy throughout the classroom. People heckled and raced to find a spot on highly-coveted ideas or urge others to join them in an idea with littl...

Final Report of Lab 2

Image
In this lab, we embarked on the journey of creating a 3D­scanner utilizing two Hobbying servo motors, a Sharp Infrared Distance Sensor, and an Arduino Uno. We created a connector that would allow us to secure a reliable connection between our Arduino and IR sensor. We patiently assembled the connector by crimping three JST connectors onto appropriately stripped wires to fit into a 3­pin JST connector. We tested the functionality of the primary parts: the sensor, the Arduino, and the servos. We adjusted and ran the AnalogInput example from the Arduino example library, which caused our sensor to blink at an increased rate whenever an object was nearby. Similarly, we ran AnalogOutSerial from the Arduino library, which allowed us to verify that values were being transmitted and that they consistently changed when an object was nearby. Lastly, we made sure our servos worked and could be controlled, using the "Sweep” example to rotate the servos. After confirming the functionality o...